
Dry Fire Draw Stroke Practice at Home with Any Holster
How to Practice Your Draw Stroke at Home with Any Holster
Marcus has competed in USPSA and IDPA for over a decade and has trained hundreds of concealed carriers through structured dry fire programs. He runs weekly dry fire clinics and writes about practical training methods that work without a range.
Most people who carry a firearm daily have never timed their draw stroke. They picked a holster, found a comfortable position and assumed the rest would work itself out under pressure. It will not. The draw stroke is a mechanical skill. Like every mechanical skill it degrades without practice and it improves with deliberate repetition. This guide shows you exactly how to build that skill at home with whatever holster you already own.
The Gap Most Carriers Never Close
Buying a holster solves one problem: where to put the gun. It does not solve the more important problem: what happens when you actually need to get the gun out fast, cleanly and consistently under stress.
The draw stroke has five distinct phases: grip, clear, rotate, meet, press. Each one has to be automatic before the next one can be fast. Most carriers practice none of them deliberately. They put the gun in the holster in the morning and take it out at night, which is not training. That is storage with extra steps.
Dry fire laser training at home closes that gap. You run the full draw stroke, with your actual holster, from your actual carry position, until every phase is automatic. The range validates the skill. Home training builds it.
How Your Holster Type Affects the Draw Stroke
The mechanics of the draw change depending on where and how you carry. Here is what each position demands from your training.
The most common carry position. The draw involves clearing the cover garment first, then establishing a full firing grip before the gun clears the holster. The garment clear is the step most people never practice and the one that costs the most time under pressure. Train it as a deliberate separate movement before adding speed to the full draw.
Faster draw angle than strong-side IWB but requires precise muzzle discipline during the draw since the gun points toward the body during the first phase of the stroke. Practice the draw slowly until the muzzle clears the body cleanly every single rep before adding any speed whatsoever.
Popular for its comfort and versatility with different clothing styles. The draw requires lifting or sweeping the covering garment rather than a simple shirt clear. The gun position can shift during the day as the band moves, which is why establishing a consistent grip on the draw is especially important for belly band carriers. Check your draw position at the start of every session.
Faster draw than IWB but harder to conceal. Still requires a cover garment clear in most carry situations. The OWB draw stroke is more forgiving than IWB for new carriers, which makes it a good starting position for building draw stroke fundamentals before transitioning to a more concealment-oriented setup.
Safety Before Every Session
- 1Remove all live ammunition from the firearm and from the room.
- 2Check the chamber visually and physically. Do it twice.
- 3Insert the laser training cartridge and holster the firearm.
- 4Keep the muzzle pointed at a solid backstop wall at all times.
- 5Remove the laser cartridge and reload only after the session is fully done.
What You Need
Your holster, your firearm and two pieces of VPDOT gear.
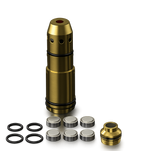
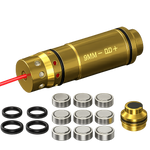
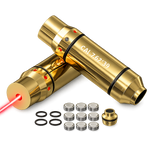
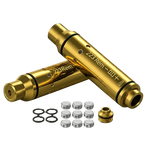
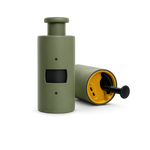
Drops into your carry gun chamber exactly like a live round. Every trigger press sends a laser pulse to your target. Available in 9mm, .223 Rem, 7.62x39 and 9x18 Makarov. Match the caliber to your carry firearm.
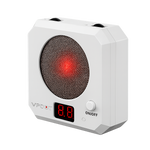
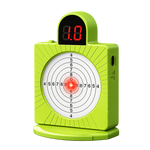
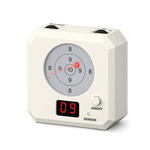
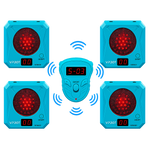
Shop Laser Training Cartridges →Compact 90x90mm electronic target with instant red and green hit feedback and a LED hit counter. Mounts on any wall or surface with the built-in magnet. Gives you real hit placement data on every single draw rep so you know exactly where each shot would have landed.
Shop Electronic Targets →4 Draw Stroke Drills for Any Holster
Run these in order. Do not skip to Drill 3 before Drill 1 feels automatic. Every drill builds on the one before it.
With the firearm holstered, practice establishing your full firing grip on the gun without drawing it. High on the backstrap, four fingers wrapped around the grip, thumb pointing forward. Do this 20 times until the grip is identical every rep. A bad grip at the holster produces a bad grip at extension every time. Fix it here before the gun ever leaves the holster.
Wearing your actual cover garment, practice sweeping or lifting the garment clear of the holster with your non-dominant hand while simultaneously moving your draw hand to the grip. Do not draw yet. Just the garment clear movement, 20 times, until it is one smooth unthinking motion. This is the step that slows down almost every concealed carrier who has never trained it deliberately.
Now combine everything. Clear the garment, establish the grip, draw, rotate the muzzle toward the target, meet with your support hand and press the trigger. One laser hit on the Smart Target per rep. Run 15 reps slowly before adding any speed. The target gives you immediate feedback on where each shot lands so you know whether your draw is putting the gun on target consistently or not.
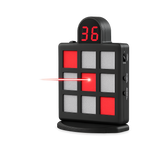
Once the full draw feels clean and consistent across 15 slow reps, start timing yourself. Use the shot timer on the 9-Grid target or a phone timer app. Draw, fire one shot, record the time. Run 10 timed reps and write down your average. A concealed carry draw from under a cover garment under 1.8 seconds is a solid benchmark for a non-competitive carrier. Track this number weekly and watch it drop over 30 days of consistent practice.
Weekly Schedule
10 to 15 minutes four times a week is enough to build a reliable draw stroke within 30 days.
Train the Draw You Carry With
A laser cartridge and an electronic target give you everything you need to build a reliable draw stroke at home with any holster. Ships from the US.
Train smarter. React faster. Be ready.