

Dry Fire Training for Women: Getting Started at Home
Dry Fire Training for Women: Getting Started at Home
Marcus has competed in USPSA and IDPA for over a decade and has trained hundreds of concealed carriers through structured dry fire programs. He runs weekly dry fire clinics and writes about practical training methods that work without a range.
Women are the fastest-growing segment of new gun owners in the US. Many buy a firearm for personal protection, take a basic safety course and then stop there. The gap between owning a firearm and being genuinely skilled with it is filled by training, and dry fire at home is the most practical, affordable and private way to close that gap on your own schedule.
Why Dry Fire Works Especially Well for New Shooters
The biggest barrier for most new shooters, regardless of gender, is the range environment itself. Noise, pressure, cost and the feeling of being watched all create anxiety that makes it hard to focus on fundamentals. Dry fire at home removes every one of those barriers.
You train with your actual firearm, at your own pace, in total privacy. There is no one watching you. There is no cost per session. There is no noise. The only thing that exists is you, your gun and the target. That environment lets you focus entirely on the mechanics of shooting rather than managing anxiety about everything around you.
The skills you build this way transfer directly to live fire. Trigger control, sight alignment, grip consistency and draw stroke are all mechanical skills that respond to repetition regardless of where those reps happen. The range validates them. Home training builds them.
Safety First, Every Single Session
These rules apply every time without exception. The discipline of running through this checklist before every session is itself a valuable training habit.
- 1Remove all ammunition from the firearm and from the room you are training in.
- 2Drop the magazine and check the chamber visually and physically. Do it twice.
- 3Insert the laser training cartridge and close the slide.
- 4Always point the muzzle toward a solid backstop wall, never at a shared wall or a door.
- 5Remove the laser cartridge and reload your firearm only after the session is completely finished.
What You Actually Need to Get Started
Three things. That is it. No range membership, no ammo budget, no shooting bench.
Train with the exact gun you own or carry. Muscle memory is specific to the firearm. Switching between different guns during training slows down the process of building reliable automatic responses.
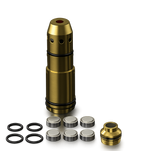
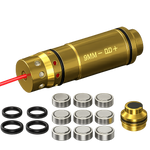
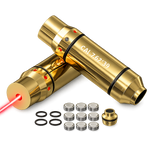
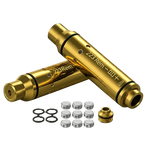
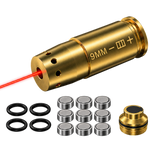
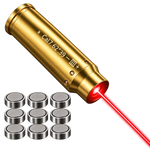
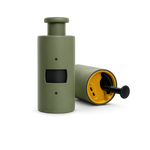
A brass dummy round that drops into your chamber and fires a brief laser pulse when the trigger is pressed. VPDOT makes them in 9mm, .223 Rem, 7.62x39 and 9x18 Makarov. Match the caliber to your firearm and it works with any pistol or rifle that accepts a standard chamber fit.
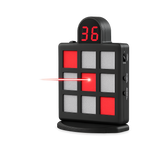
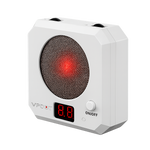
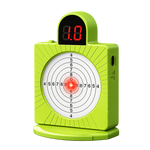
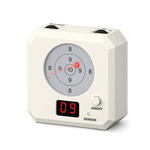
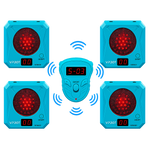
Shop Laser Training Cartridges →A blank wall tells you nothing. An electronic target tells you exactly where every shot landed with instant sound and light feedback. The VPDOT Smart Laser Training Target is compact enough to sit on a bookshelf and gives you real-time hit feedback with a LED counter. For new shooters it is the difference between guessing and knowing.
Shop Electronic Targets →A Note on Firearm Fit
One of the most common issues for new female shooters is a firearm that does not fit their hand properly. A grip that is too wide makes it harder to reach the trigger correctly, which affects everything downstream including trigger control and accuracy.
If you are still choosing a firearm, look for one with a grip circumference that lets you wrap your hand fully around the grip with your trigger finger reaching the center of the trigger pad naturally without stretching. Many modern 9mm pistols like the Sig P365, Smith and Wesson M&P Shield and Glock 43 are purpose-built for smaller hands and are worth considering.
If you already own a firearm that feels slightly large, dry fire practice actually helps here too. The repetition of gripping, pressing and regretting builds hand strength and familiarity that makes the gun feel more natural over time.
5 Drills to Start With
These five drills cover the fundamentals that every new shooter needs. Start with Drill 1 and do not move to the next until the current one feels automatic and consistent.
Pick up the firearm and establish your grip without pointing at anything. High grip on the backstrap, strong hand thumb pointing forward, support hand filling the gap on the grip panel with thumbs stacked. Practice this grip 20 times until it feels identical every single time. Then stand in a shoulder-width stance, slightly bent knees, weight slightly forward. This is your base. Everything else is built on it.
Point the firearm at the Smart Target at 3 meters. Line up your front sight with the rear sight notch so the top of the front sight is level with the top of the rear sight and centered in the notch. Hold that sight picture for 10 seconds without pulling the trigger. Just hold it. Repeat 10 times. Sight alignment is a skill of stillness before it is ever a skill of speed. Most new shooters rush this step.
Aim at the center of the Smart Target and press the trigger as slowly as possible. Watch where the laser dot is when the shot breaks. If it moves before the trigger fires, you are disturbing the gun during the press. The goal is for the trigger to break while the dot is perfectly still. Do 20 slow reps. No speed, no timer. Just control. This single drill fixes the most common accuracy problem in shooting.
Once grip and trigger press feel automatic, add the draw. Start with your hand at your side. Bring the gun up from the holster (or from a ready position if you do not carry), establish your grip, acquire the sight picture and press the trigger. Do this slowly 15 times before you ever think about timing yourself. The draw stroke has multiple components and rushing any one of them creates habits that take twice as long to fix later.
Once the fundamentals are consistent, switch the Smart Target to a timed mode and start adding speed to your trigger press drill. Your goal is to maintain the same sight picture quality at faster speeds. If your hits start going wide you are going too fast. Back off and find the speed at which you can keep hits centered. That is the speed to train at. Speed without accuracy is not a skill.
A Realistic First Month Schedule
10 minutes a day is enough when you are building foundations. Do not try to do too much too soon. Consistency beats volume at this stage.
Mistakes That Are Easy to Avoid
Speed is the result of correct repetition, not the goal of early practice. Slow reps with perfect form build the neural pathways that later produce fast, accurate shooting automatically.
Run through the safety checklist before every single session, even if you trained yesterday. The habit of verifying the chamber is clear is as important as any shooting skill you will ever develop.
Pointing at a blank wall and pulling the trigger 50 times teaches you very little. The Smart Target shows you exactly where every shot lands. That feedback is what allows you to self-correct and improve.
The feeling of readiness comes from repetition, not before it. If you own a firearm for personal protection, you are already responsible for being skilled with it. Starting today, even imperfectly, is better than waiting indefinitely.
Start Training on Your Own Terms
A laser training cartridge and an electronic target. Everything you need to build real skills at home, at your own pace, in complete privacy. Ships from the US.
Train smarter. React faster. Be ready.